Carpal Tunnel At Home Exercises
THE FACTS: - Carpal Tunnel Syndrome is the #1 reported medical problem, accounting for about 50% of all work-related injuries - Surgery for Carpal Tunnel Syndrome is the second most common type of surgery, with well over 230,000 procedures performed annually. - Women are twice as likely to develop Carpal Tunnel Syndrome as opposed to their male counterparts. Alarming, isn’t it? Isn’t there a better way to cure CTS than expensive surgeries? I am not a medical doctor, but I believe I have found a way that will help many people: at-home exercises that have been passed down by wise people for centuries. Read on. THE EXERCISES:
Instructions on When and How Many:
EXERCISE 1 – SEATED BALL SQUEEZES
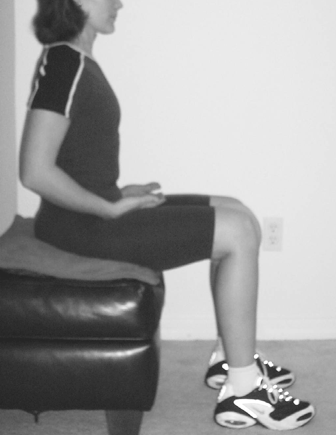 - 90 Degree angle at the hips.
 - Place ball between knees and squeeze, 3 sets of 15 reps.
EXERCISE 2 – SUPINE BALL SQUEEZES 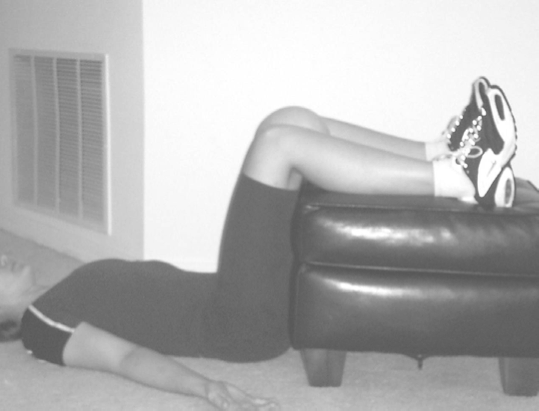 - Lie flat on your back. There should be a 90 degree angle at your hips and knees.
EXERCISE 3 – GRAVITY DROP 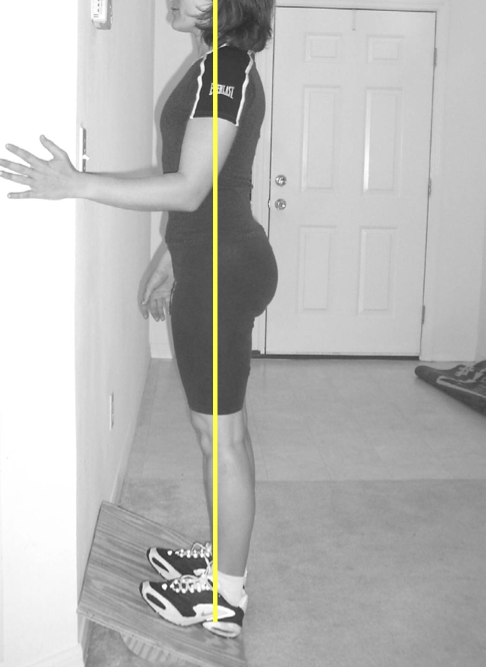 This exercise is great for reducing any rotation in your body. If you can recall – rotation is when for example when you looked at your front view how your 1 hand seemed to be more in front of your body compared to the other side. EXERCISE 4 – THE WALL CLOCK 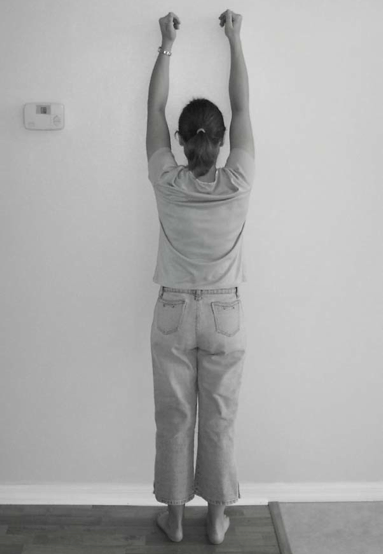 Starting position: Feet hip width, toes pointing straight forward. Body as close to wall as possible. Arms elevated above head with palms rotated open and thumbs facing backwards. Exercise: This is a static position. Hold externally rotated arm position for 0-60 seconds in all 3 positions. Breath in through the nose exhale through mouth. Relax your neck! Pre-caution: You may not be able to do this if you have a rotator cuff tear or other serious shoulder condition. If you have severe muscle imbalance you may experience burning and tingling in your arm. Start a comfortable distance from the wall and work your way closer. With severe pain that increase, STOP the exercise! Purpose: This exercise will re-align you head with your torso and decrease the forward head position. It will also release tight shoulder and chest muscles that is causing your shoulder, elbow and wrist joint pain and CTS. 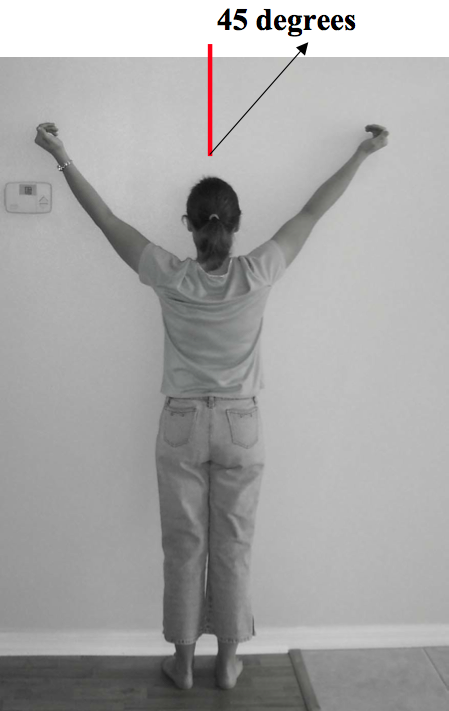 Hold for 1-60 seconds, please review instructions at first picture. 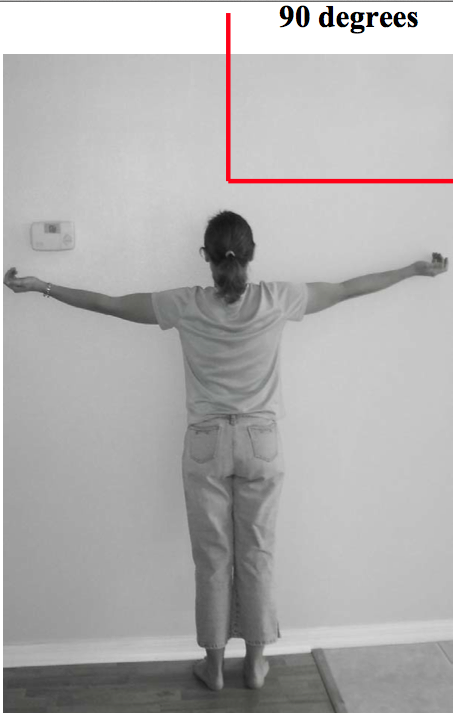 Hold for 1-60 seconds. Attempt to keep your hold body relaxed and elbows straight and palms open. EXERCISE 5 – SUPINE GROIN STRETCH 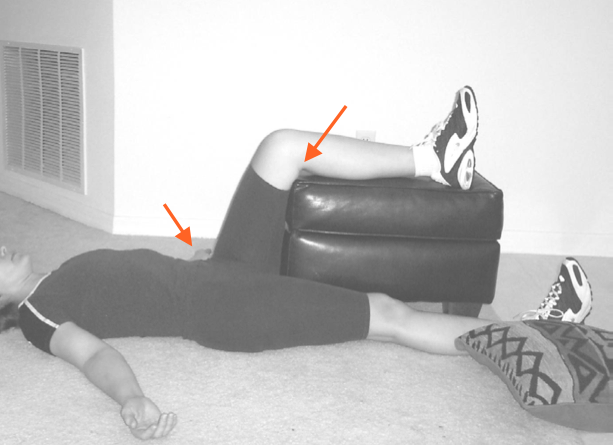 Stay in the same position as in the static back but this time rest on leg on a padded coffee table/chair or something that can support the whole leg. It is very important that you maintain a 90 degree angle at both the hip as well as the knee as indicated by the red arrows. The leg that rest on the table has to be fully supported from the foot to the back of the knee. Breathe through your stomach and totally relax. Perform the exercise on both sides 10 minutes each. 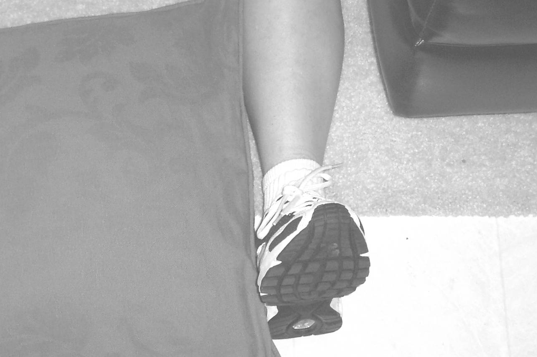 As demonstrated in the above photo, be sure that the foot that is resting on the floor maintains an upright position and that it do not rotate out to the side. This will ensure that your hip flexors release adequately. EXERCISE 6 – WALLSIT 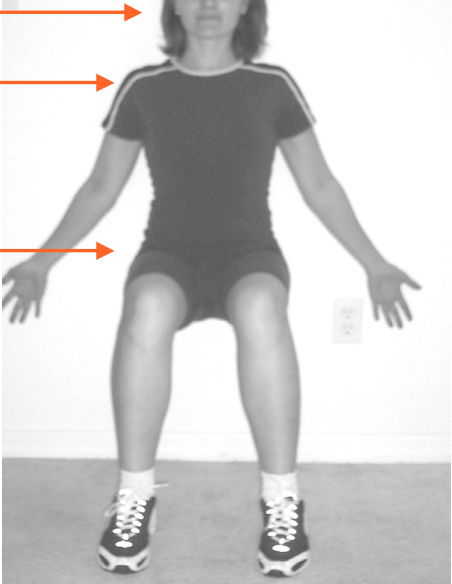 This exercise is great for building up leg strength and restoring postural balance. Try and hold for 1 minute. Your head, shoulders, buttocks and arms should be pushing back into the wall. Your weight should be over the middle and back part of both feet and the feet should be pointing straight forward. The feet should be positioned hip width. Maintain a 90 degree angle at the hips and knees. If you are experiencing knee pain at the knee caps your weight should be resting more towards the back of the feet – more towards the heels. 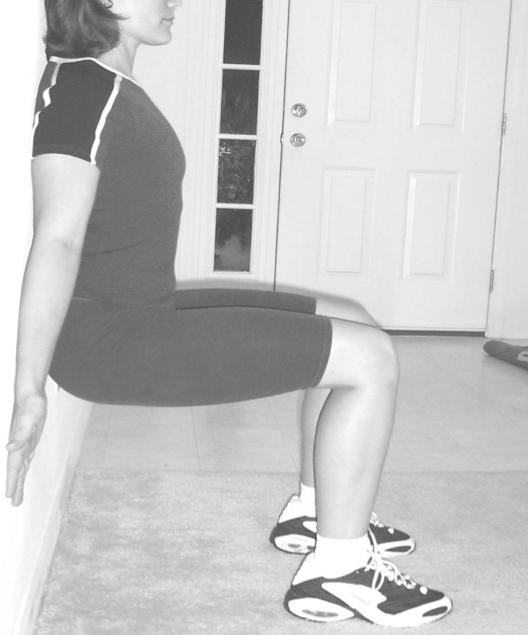 This is a side view of the wall sit. Notice the 90 degree angle and how the head, shoulders and butt stay in contact with the wall. The arms are facing palms up and are pushing back into the wall. Doing these exercises daily will AT LEAST improve your quality of life, if not eliminate your CTS issues for good! BUT don't forget that getting rid of carpal tunnel is about more than exercises. It's about a change in lifestyle! There are many things you can change throughout your everyday routine that will nip your carpal tunnel in the bud. Click here to read more about lifestyle prevention tips.
|
|